Debug dedicated servers locally
Armada is deprecated, replaced by AccelByte Multiplayer Servers (AMS), our next-generation dedicated server orchestration product. AGS Premium customers can ask your AccelByte account team about enabling AMS for your environments.
Armada is not available on AGS Starter tier, use AMS instead.
Overview
Unlike managed dedicated servers that require the server to be uploaded to Armada, a local dedicated server runs on your local computer. This enables you to test, debug and profile your dedicated server builds, without ever needing to upload the build onto Armada.
Goals
- Learn how to register a local dedicated server to Armada
- Learn how to matchmake in a local dedicated server
Prerequisites
Before you begin this guide, you should have the ability to complete the following:
- Set up an IAM client for dedicated servers, with the following permission:
| Permission name | Action |
|---|---|
NAMESPACE:{namespace}:DSM:SERVER | Update |
Maintain one IAM client for all your dedicated servers to use.
Prepare a dedicated server executable, that can be built with the Linux architecture.
Install and configure the AccelByte Game SDK for your project. The AccelByte Game SDK is available for both Unreal and Unity:
Register a Local Dedicated Server on Armada
To register your local dedicated server to Armada, call the following APIs from the appropriate SDK. This will be the SDK that you integrated your dedicated server with. Unlike registering a managed dedicated server, you need to provide the IP address and port of your local dedicated server to Armada, as well as the server name.
The server name is particularly important, since it is how the matchmaker locates your local dedicated server.
Similarly to registering a managed dedicated server with Armada, call these APIs after your dedicated server is ready to take on a game session.
- Unreal
- Unity
FString IpAddress = FString("https://127.0.0.1");
int32 Port = 7777;

FString ServerName = FString("my-awesome-game-server");

FRegistry::ServerDSM.RegisterLocalServerToDSM(IpAddress, Port, ServerName, FVoidHandler::CreateLambda([]()
{
 // Do something if RegisterLocalServerToDSM has been successful
}), FErrorHandler::CreateLambda([](int32 ErrorCode, const FString& ErrorMessage)
{
 // Do something if RegisterLocalServerToDSM has an error
 UE_LOG(LogTemp, Log, TEXT("Error RegisterLocalServerToDSM, Error Code: %d Error Message: %s"), ErrorCode, *ErrorMessage);
}));
string ip = "https://127.0.0.1";
uint port = 7777;
string name = "my-awesome-game-server";
    AccelByteServerPlugin.GetDedicatedServerManager().RegisterLocalServer(ip, port, name, result =>
    {
        if (result.IsError)

        {
            // Do something if RegisterLocalServer has an error
            Debug.Log($"Error RegisterLocalServer, Error Code: {result.Error.Code} Error Message: {result.Error.Message}");
        }
        else
        {
            // Do something if RegisterLocalServer has been successful
        }
    });
Verifying your Local Dedicated Server
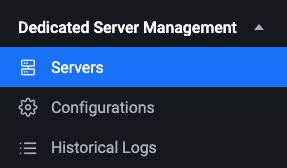
Once you have called the registration endpoint, login to your admin portal, and then click the Server button under the Dedicated Server Management section on the sidebar.
You should be able to see some running local servers on the subsequent page. To examine your local server, click the arrow button inside the local servers tab.

You should now be able to see the status of your local servers.

Deregistering a Local Dedicated Server
Your local dedicated server will stay registered for 24 hours, before it is removed automatically. Alternatively click the Delete button next to your local server entry on the admin portal, to delete the session. However, if you want to do this programmatically, call the following APIs.
- Unreal
- Unity
FString ServerName = FString("my-awesome-game-server");
FRegistry::ServerDSM.DeregisterLocalServerFromDSM(ServerName, FVoidHandler::CreateLambda([]()
{
 // Do something if DeregisterLocalServerFromDSM has been successful

}), FErrorHandler::CreateLambda([](int32 ErrorCode, const FString& ErrorMessage)

{
 // Do something if DeregisterLocalServerFromDSM has an error

 UE_LOG(LogTemp, Log, TEXT("Error DeregisterLocalServerFromDSM, Error Code: %d Error Message: %s"), ErrorCode, *ErrorMessage);
}));
AccelByteServerPlugin.GetDedicatedServerManager().DeregisterLocalServer(result =>
      {
          if (result.IsError)
          {
              // Do something if DeregisterLocalServer has an error

              Debug.Log($"Error DeregisterLocalServer, Error Code: {result.Error.Code} Error Message: {result.Error.Message}");
          }
          else
          {
              // Do something if DeregisterLocalServer has been successful
          }
      });
Matchmaking with a Local Dedicated Server
The primary advantage of using a local dedicated server is to enable the use of matchmaking. This gets players into the server, so you can debug and profile your server locally. The diagram below describes how a local dedicated server interacts with the matchmaker, and the game client:

To matchmake players into a local server, provide the Server Name that you recorded earlier.
- Unreal
- Unity
FString GameMode = FString(""); //game mode is irrelevant to matchmaking into a local server
FString ServerName = FString("my-awesome-game-server");

FRegistry::Lobby.Connect();
FRegistry::Lobby.SetMatchmakingNotifDelegate(AccelByte::Api::Lobby::MatchmakingNotif.CreateLambda([](const FAccelByteModelsMatchmakingNotice& Result)
{
 if (Result.Status == EAccelByteMatchmakingStatus::Done)
 {
  FString MatchId = Result.MatchId;
 }
}));
FRegistry::Lobby.SendStartMatchmaking(GameMode, ServerName);
string gameMode = ""; //game mode is irrelevant to matchmake into a local server
String serverName = "my-awesome-game-server";

AccelBytePlugin.GetLobby().Connect();
    AccelBytePlugin.GetLobby().StartMatchmaking(gameMode, serverName, result =>
    {
        if (result.IsError)
        {
            // Do something if StartMatchmaking has an error
            Debug.Log($"Error StartMatchmaking, Error Code: {result.Error.Code} Error Message: {result.Error.Message}");
        }
        else
        {
            // Do something if StartMatchmaking has been successful
        }
    });
Although a local server allows you to matchmake players on your local machine, it doesn't automatically do port forwarding for you, or serve as a relay for these players to connect to your local server. You will still need to handle the port forwarding in your code, if your machine is under a router.
Troubleshooting
My Local Server Entry Lingers after Shutdown
Your local server entry will survive for 24 hours before it is automatically deleted. If you want to delete the server entry, you need to do so manually on the admin portal, or programmatically by following the steps in Deregistering a Local Dedicated Server.