Configuring the Armada environment
Armada is deprecated, replaced by AccelByte Multiplayer Servers (AMS), our next-generation dedicated server orchestration product. AGS Premium customers can ask your AccelByte account team about enabling AMS for your environments.
Armada is not available on AGS Starter tier. Use AMS instead.
Overview
Before you can use Armada to spin up dedicated servers for your game, you will need to properly configure the Armada environment on the namespace that you run your game in. A wizard is provided for you to quickly get through this process. The purpose of this topic is to guide you through use of this wizard, and to understand the various general configurations of Armada.
Prerequisites
- You have access to the Admin Portal and the Namespace for your game.
Starting the Configuration Wizard
Follow the processes below to start your configuration wizard:
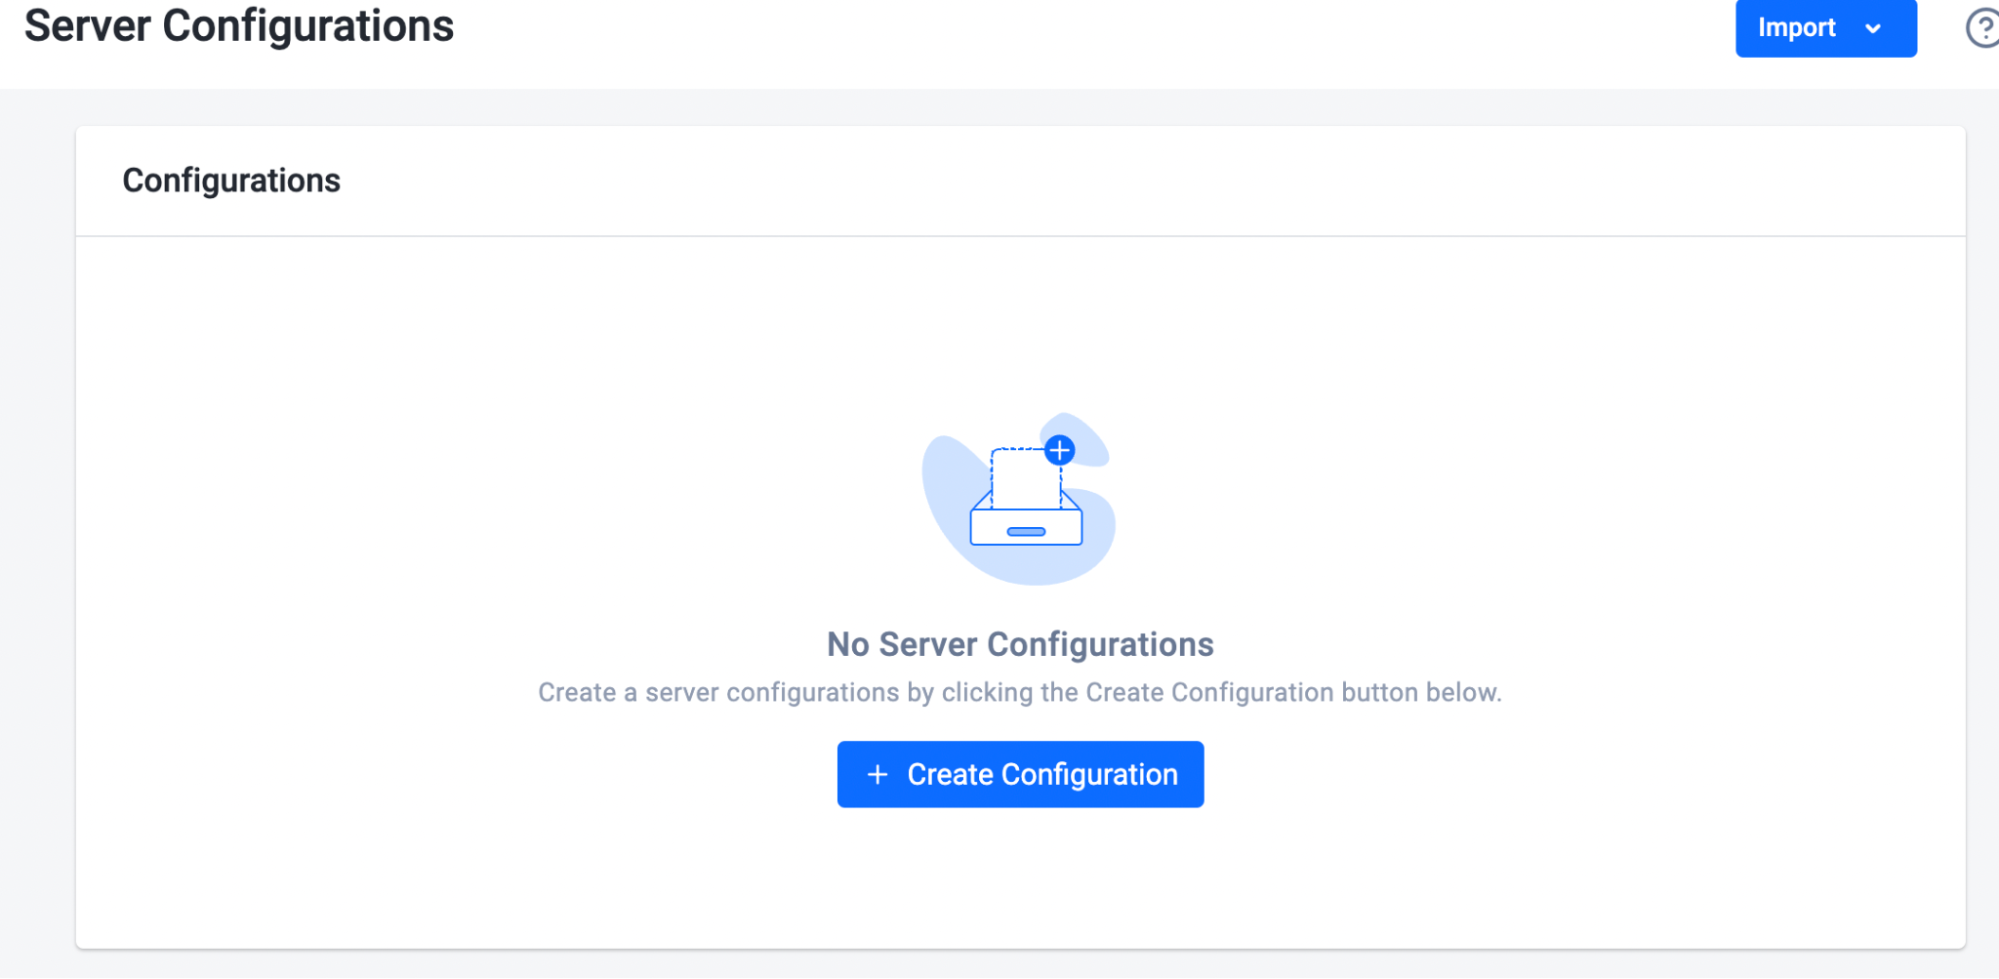
- Click on the Configurations button under Dedicated Server Management on the side bar.
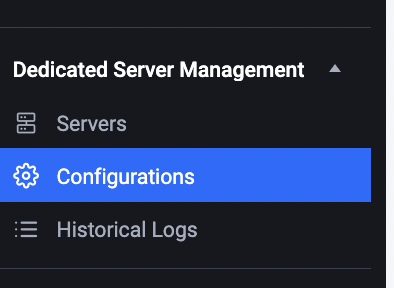
- Click on the Create Configuration button to start the setup wizard.
Configuring Server Timeouts
The configuration wizard will take you to the Server Timeout configuration. Server timeouts are essential safeguard parameters against dedicated servers that have gone down, or are performing poorly.
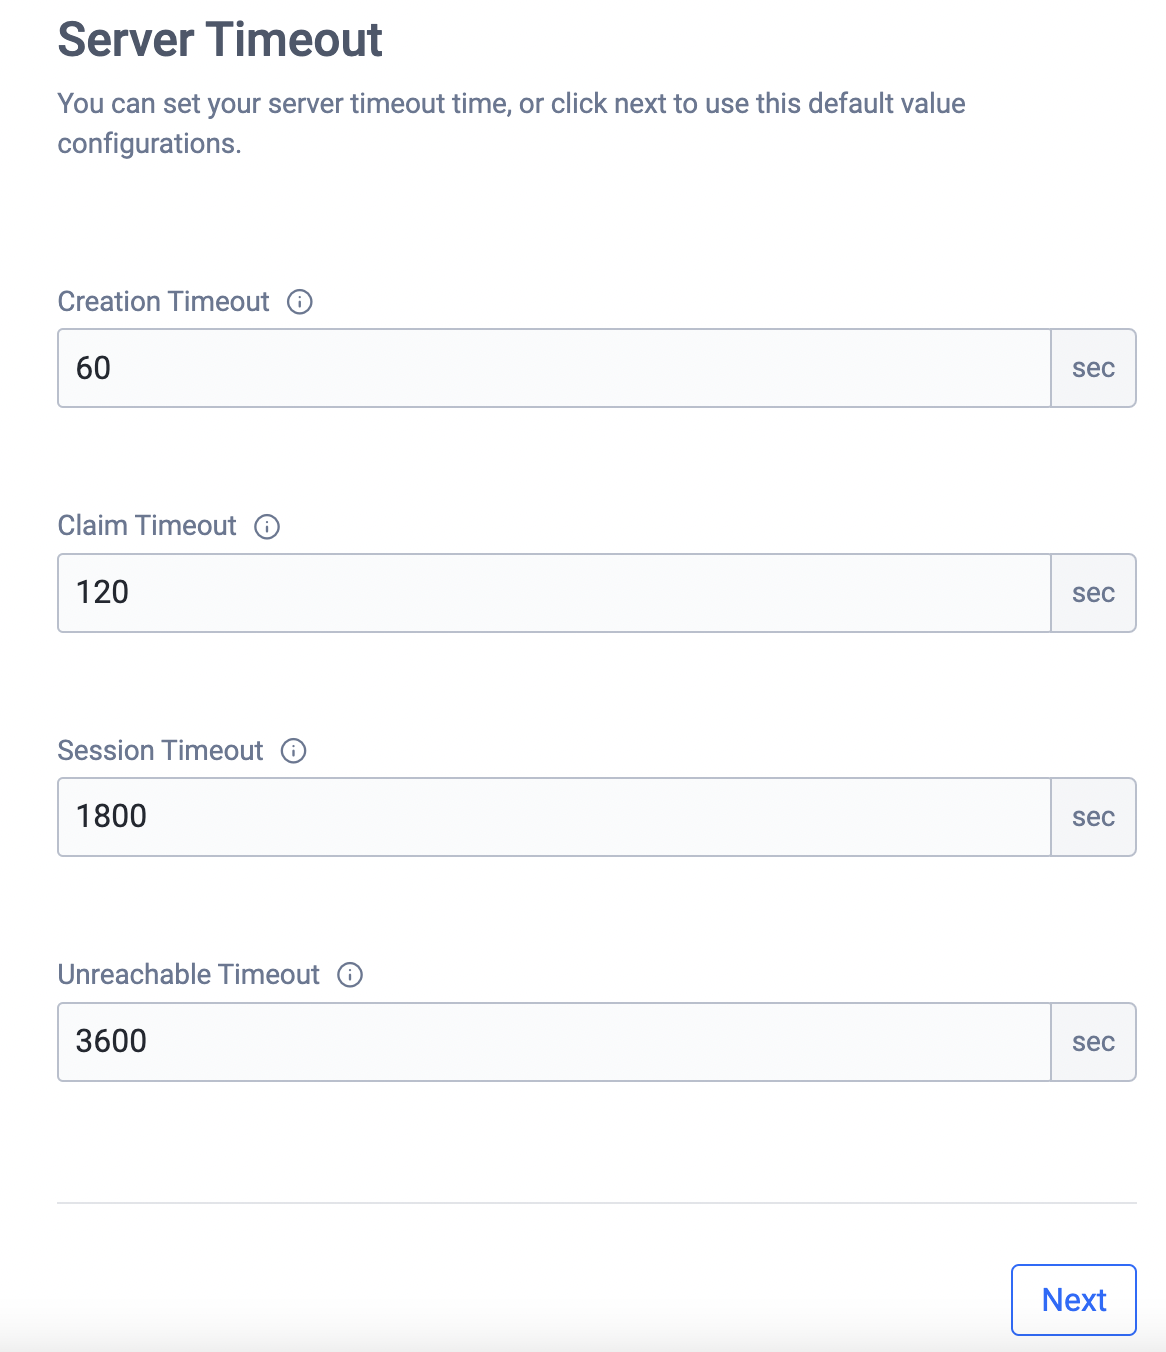
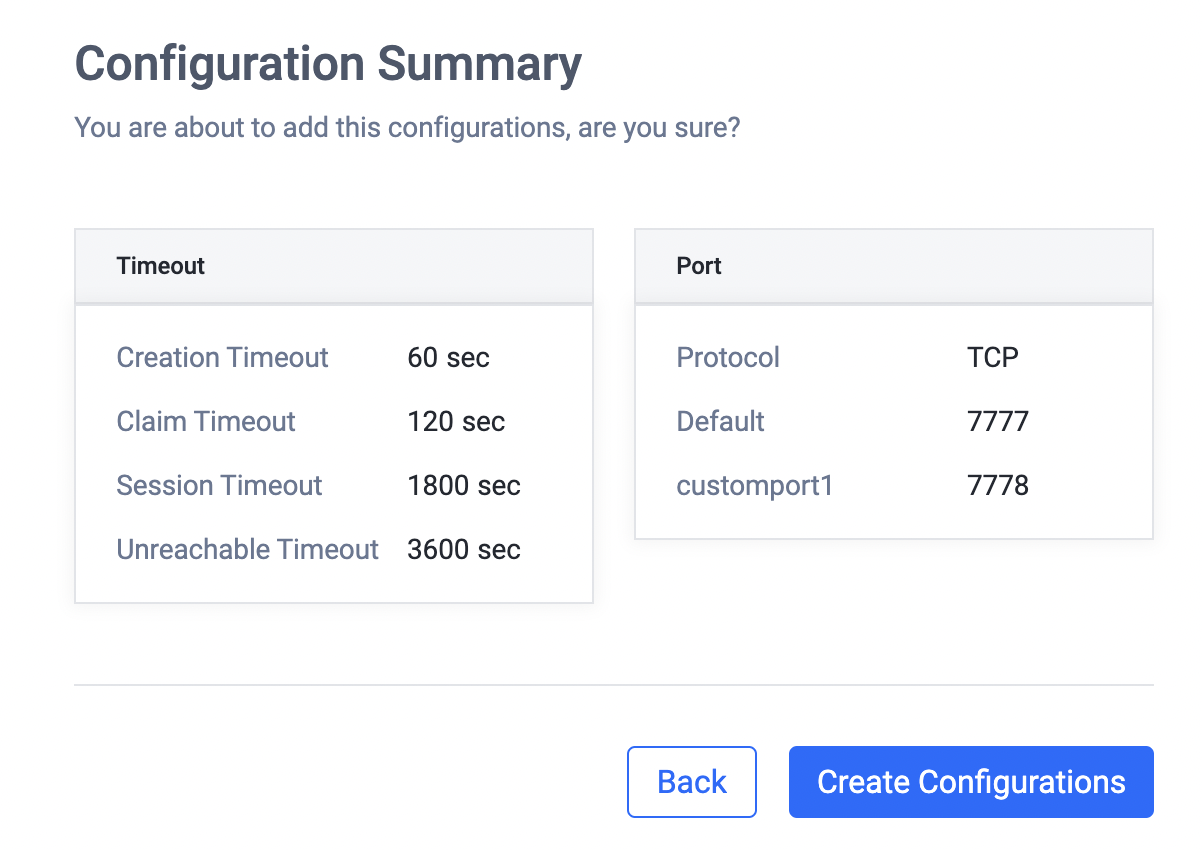
Creation Timeout
The creation timeout starts when Armada spins up your dedicated server, and marks its state as Creating. This timeout gives a configurable time limit for your dedicated server to initialize, so that when your dedicated server fails to do so, Armada will remove the server, and return its resources back to the regional cluster.
The creation timeout is applicable only when the dedicated server is in the Creating state. Once the dedicated server registers itself to the dedicated server manager, it will enter the Ready state.
The default value for this timeout is 60 seconds.
Claim Timeout
This unique timeout is only applicable when an external service (such as Matchmaking) requests a dedicated server from Armada in the absence of suitable buffers. In this case, Armada will first start spinning up a dedicated server and wait for it to be ready (the usual process). Then the claim timeout will start to wait for the external service to claim the server for the game session.
The default value for this timeout is 120 seconds.
Session Timeout
The session timeout starts when the dedicated server starts serving a game session and enters the Busy state. It gives a time limit for your dedicated server to serve a game session, so that Armada can remove stale servers that fail to exit themselves normally, once a game session has finished.
The default value for this timeout is 1800 seconds.
Unresponsive Timeout
The unresponsive timeout refreshes when a server finishes its last health check with Armada. It gives a time limit for your dedicated server to recover the connection to Armada in case of any network interruption. If the timeout is exceed Armada can remove the server and recover its' resources.
The default value for this timeout is 3600 seconds.
Configuring Server Ports
The next step is to configure the ports that your dedicated servers listen to.
- To set up a main port that your dedicated server listens to, change the value in the Main Port field.

- If your dedicated servers listen to more than one port, you can do so by checking the Use Multiple Ports option. Then give the additional port a friendly name and a corresponding port number. To continue to add more ports, click the Add More Port button.
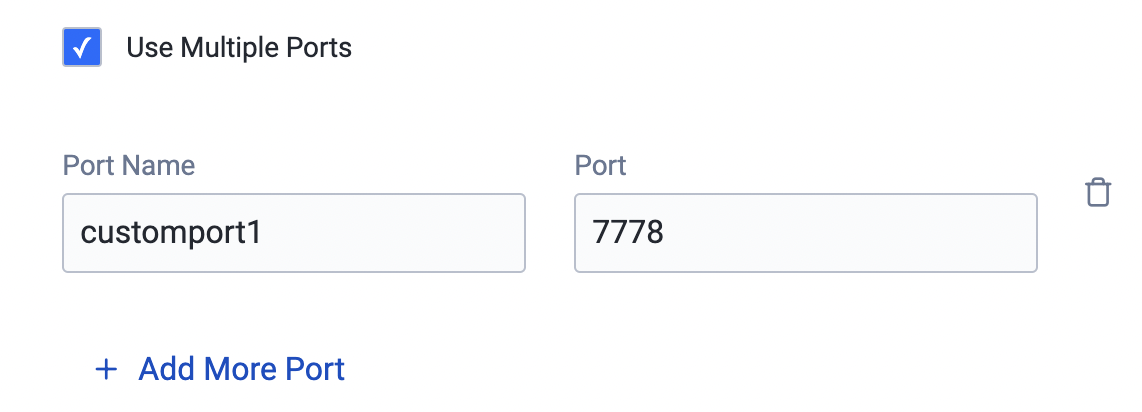
- Click the Next button to review your configuration.
Note: the ports that the dedicated servers listen to are not the same as the ports that your game client will connect to. Multiple dedicated servers will be run under the same virtual machine. Therefore Armada will generate a unique set of ports for each dedicated server, that the game clients connect to, and forward the port connections to the corresponding server.
Reviewing the Configurations
Finally, you are able to review all your completed configurations. If satisfied, click the Create Configurations button.
Updating the Configurations
The next time you click the Configurations button, or immediately after finishing with the configuration wizard, a new form will be available on the Configuration page. This form enables you to make changes to the timeouts and ports.
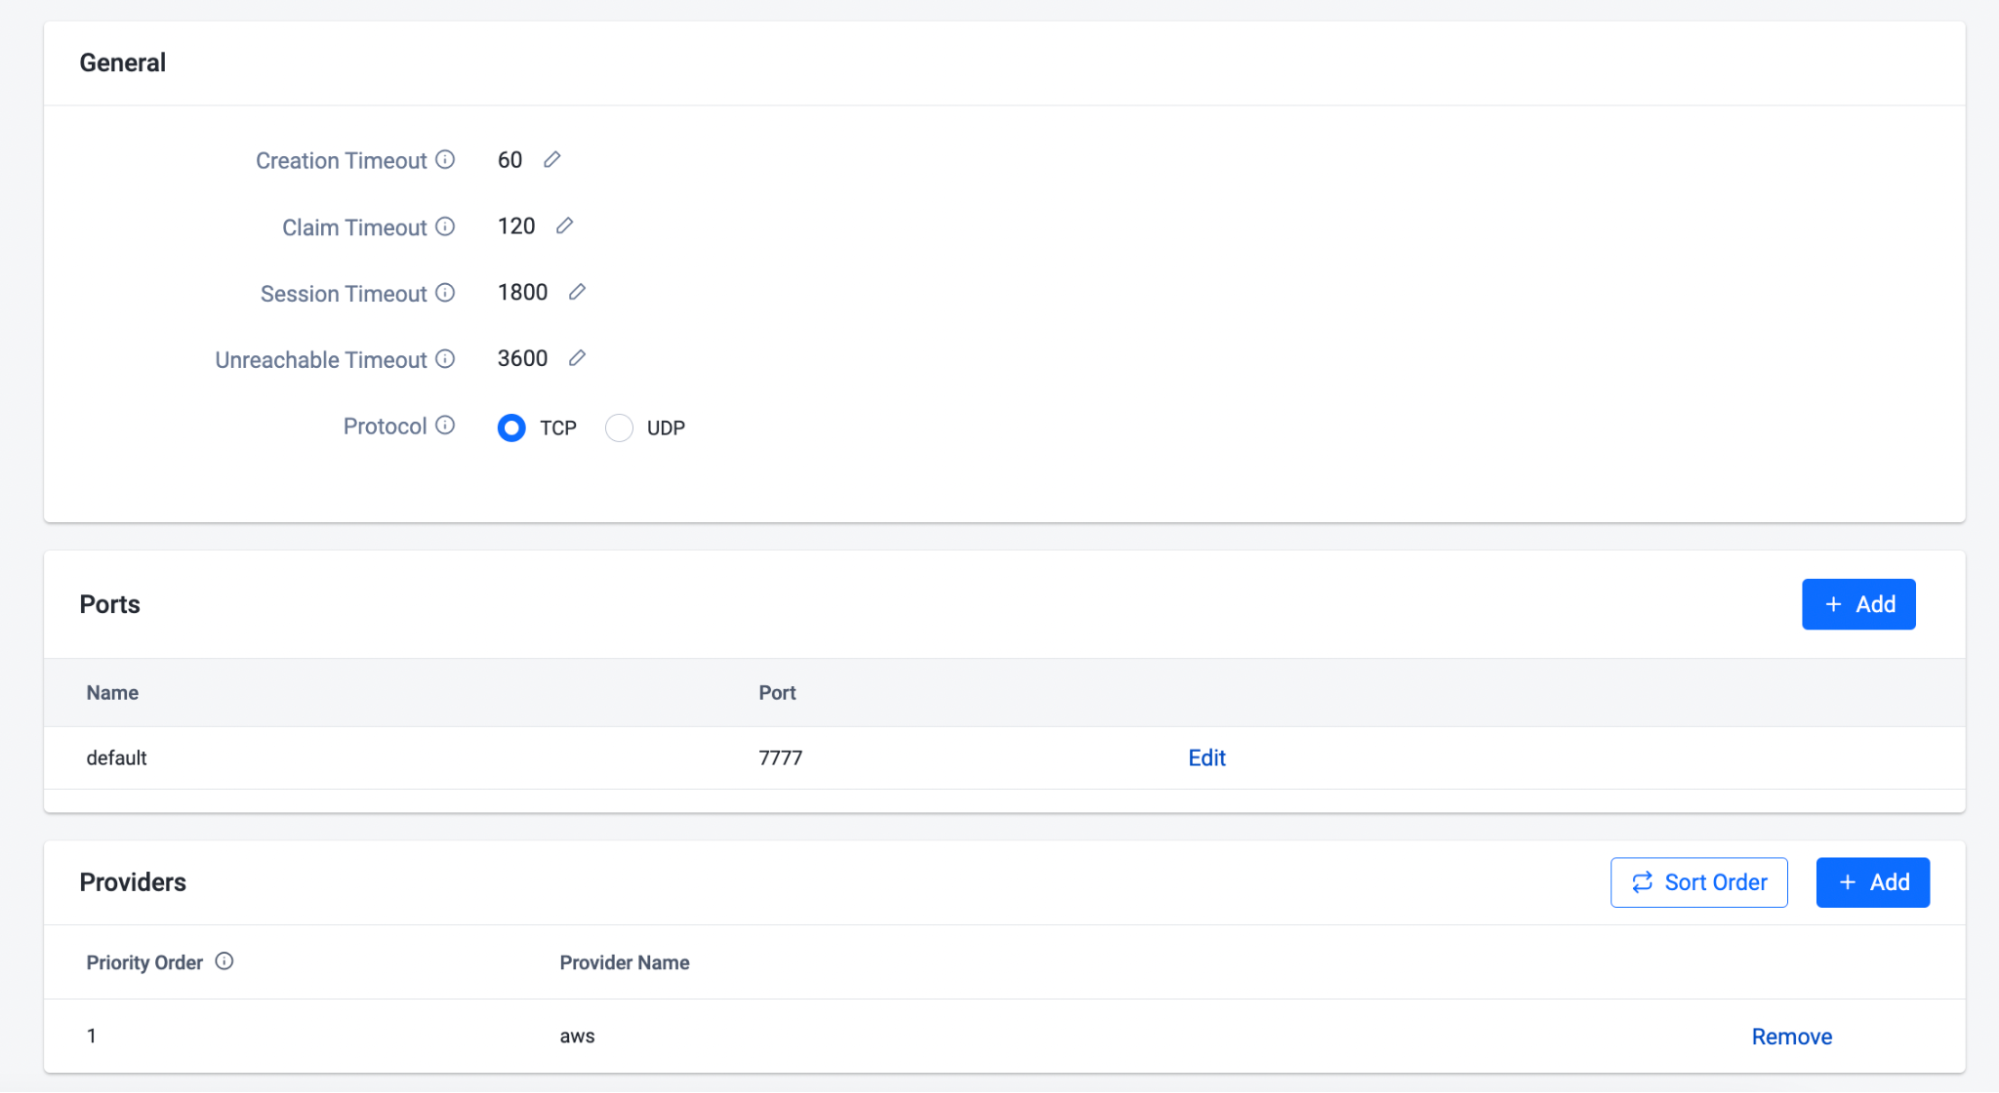
Updating the Providers Configuration
The Providers Configuration enables or disables virtual machine providers that you have access to, and adjusts the providers' priority order that your game uses for its' virtual machines.

The only way to add new providers is to make a request to AccelByte. Please consult with your development partner manager (DPM) if you wish to see what options are available to you.