Upload a dedicated server build using the AMS CLI
Introduction
AccelByte Multiplayer Servers (AMS) can be configured to automatically distribute dedicated servers regionally. The dedicated servers are used to serve game sessions. The first step is to upload the dedicated server build to an AMS account so that AMS can containerize these dedicated server builds for regional distribution.
This article walks you through how to:
- Use the AMS command line interface (CLI) to upload a dedicated server image
- Create an upload command
Prerequisites
Before you begin this guide, you must have:
Created an IAM client for uploading dedicated servers with the following permission:
Permission name Action AMS:UPLOADCreate, Update We recommend that you create an API client specifically for uploading dedicated servers. The IAM client will be used to verify the identity of the uploader. To learn how to create an IAM client, see Create an IAM client.
If you are an AGS Starter customer, you can create an IAM client with all the necessary permissions for dedicated server uploading by clicking Create DS Uploader IAM Client under the Create New button on the IAM Clients page. A client that is capable of uploading a dedicated server has the DS Uploader tag.
- Stored the dedicated server executables and any supporting files within a folder.
- The dedicated server images are built in either x84 or x64. ARM is currently not supported.
- The dedicated server images are built on Linux.
The upload and build process
AMS has a number of services to facilitate the upload and build process.
The AMS CLI uploads your dedicated server files onto a remote drive. Once the upload is finished, the AMS Shipyard Service will proceed to containerize the files alongside the other essential services to be deployed to a hosting machine. The resulting image is then stored in a centralized container repository, ready to be downloaded by the hosting machine to spin up dedicated servers.
All dedicated server images are stored under an account, meaning that all namespaces that share the same account will have access to all the server images that are uploaded to it.
Using the dedicated server uploader
The general base command would be similar to this:
> ams-cli upload -H <host> -c <iam_client_id> -s <iam_client_secret> -n <image_name> -p <path_to_server_folder> -e <exec_command>
More help is available directly in the AMS CLI to build your command. To access the help menu, simply type ams upload –help. The following options will be shown to you:
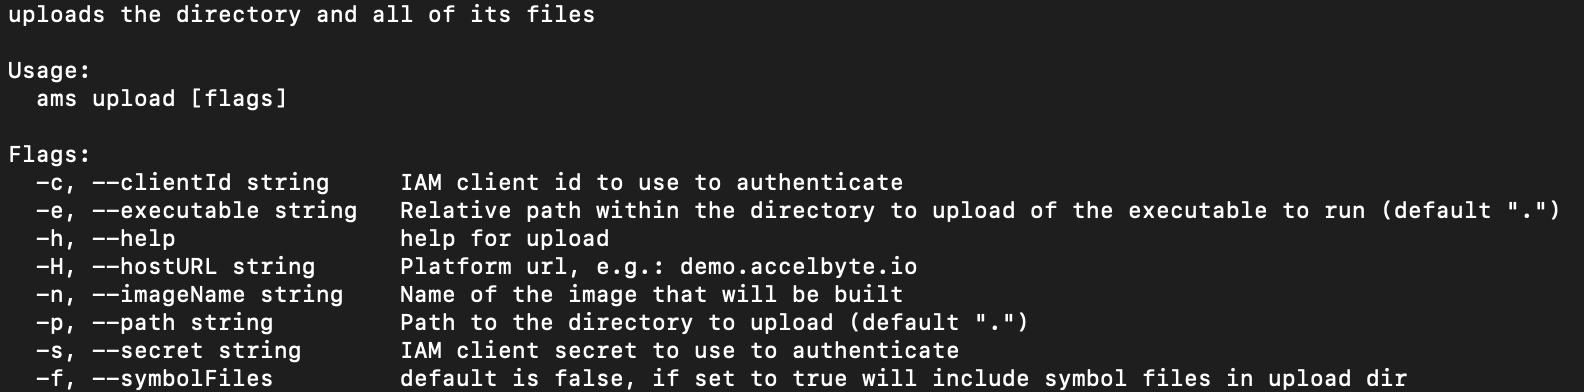
Command flags
-c,--clientIdThe IAM client ID to be used for the uploader to authenticate.
-e,--executableRelative path within the directory to upload of the executable to run.
-H,--hostURLSpecify the host name of the environment that you want to upload to. The host name is the base URL of the environment, without the
https://.-n,--imageNameName of the image that is going to be built.
-p,--pathThe local path to your dedicated server to be uploaded. This can either be an absolute path or a relative path.
-s,--secretSpecify the IAM client secret to be used for the uploader, to authenticate if the IAM client in use is a confidential client. Otherwise this option can be skipped.
-f,--symbolFiles(Optional)Use this option if you want your debug symbols to be uploaded alongside the server files. The default is false.
The AMS CLI doesn't accept a namespace parameter. Instead, the namespace is retrieved from the IAM Service's JSON Web Token that's associated with the client ID you created.