Activate AMS and create AMS account
Overview
This article walks you through activating the AccelByte Multiplayer Servers (AMS) add-on in your namespace and creating an AMS account.
In Starter, the AMS add-on is available for a free trial with the following limitations:
- The free trial will expire 120 days after activation.
- You can create only one AMS account, which you can link to the game namespaces in your studio.
- You will have access to:
- 1 ttx1.s AMS instance (2 vCPUs, 2 GB RAM) for 2,160 hours (90 days)
- 224 GB of network egress available for up to four players at ~60kbps per player for 2,160 hours (90 days)
- You can create up to three fleets, which you can assign to the North America East region only.
- You can upload and maintain up to 50 GB of dedicated server images.
You can keep track of your AMS usage in your studio namespace. Go to your studio namespace and click on Usage on the sidebar. On the Usage page, you will see your AMS usage information and for every other add-on you've enabled in your AGS account.
Prerequisites
- Access to the AccelByte Gaming Services (AGS) Admin Portal.
- An existing studio and game namespace.
Activate AMS in your namespace
- AGS Starter
- AGS Premium
Go to your studio namespace on the AGS Admin Portal.
On the homepage, go to the Add-ons section. You will see the option to activate AMS.
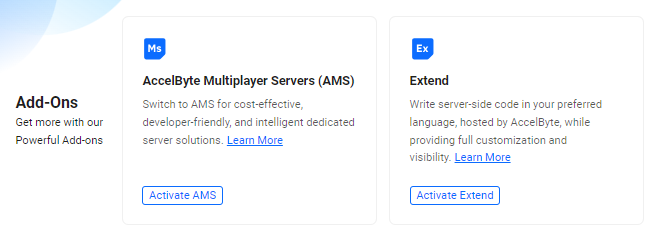
Click on the the Activate AMS button. A pop-up showing the AMS limitations on Starter appears.
Click on Start Free Trial. AMS is now activated in your studio and across your game namespaces. You can proceed to creating an AMS account.
As a Premium customer, the AMS add-on can be enabled in your namespace by request. Contact your AccelByte Account Manager or Technical Producer for more information.
Create an AMS account
When an AMS account is created from a game namespace, the account is automatically linked to that namespace. AMS supports account linking across game namespaces to share resources such as server images, observability account and metrics, and a billing account. See Link your AMS account to your games.
- AGS Starter
- AGS Premium
In Starter, you can only create one AMS account, which you can later on link to your other game namespaces.
To create an AMS account, follow these steps:
Go to your game namespace on the AGS Admin Portal.
On the sidebar, under the ADD-ONS menu, select AccelByte Multiplayer Servers. The AMS welcome page appears.
In the Set up AMS account section, type in a name for your AMS account.
Click Create, then click Yes on the pop-up. The details page of your AMS account appears.
After you create your AMS account, the full functionality and user interface for AMS will be enabled under the AccelByte Multiplayer Servers menu on the Admin Portal sidebar.
If you have multiple AGS environments and/or multiple game namespaces, see Link your AMS account to your games for how to link your AMS account to them.
What's next
Now that you have set up you AMS account, see Download CLI tools from the Admin Portal to get the AMS tools for your local development environment.