Configure Peer-to-Peer (P2P) for your game using Unity SDK
Introduction
AccelByte Gaming Services (AGS) supports P2P networks for your game. Peer-to-peer (P2P) gaming leverages decentralized networking architecture, enabling players to directly connect with each other without relying on centralized servers. This approach offers numerous benefits, including reduced latency, improved scalability, and enhanced player autonomy.
By distributing the game's workload across participating peers, P2P gaming can alleviate strain on server infrastructure, resulting in smoother gameplay experiences and decreased likelihood of server downtime. Additionally, P2P networks facilitate player-to-player interactions, fostering a sense of community and enabling seamless multiplayer experiences across various platforms.
How it works
This section contains diagrams showing how P2P will work in AGS using Unity SDK.
Host a game
Client join a game
Set up matchmaking V2 configuration
Follow these steps in the Admin Portal:
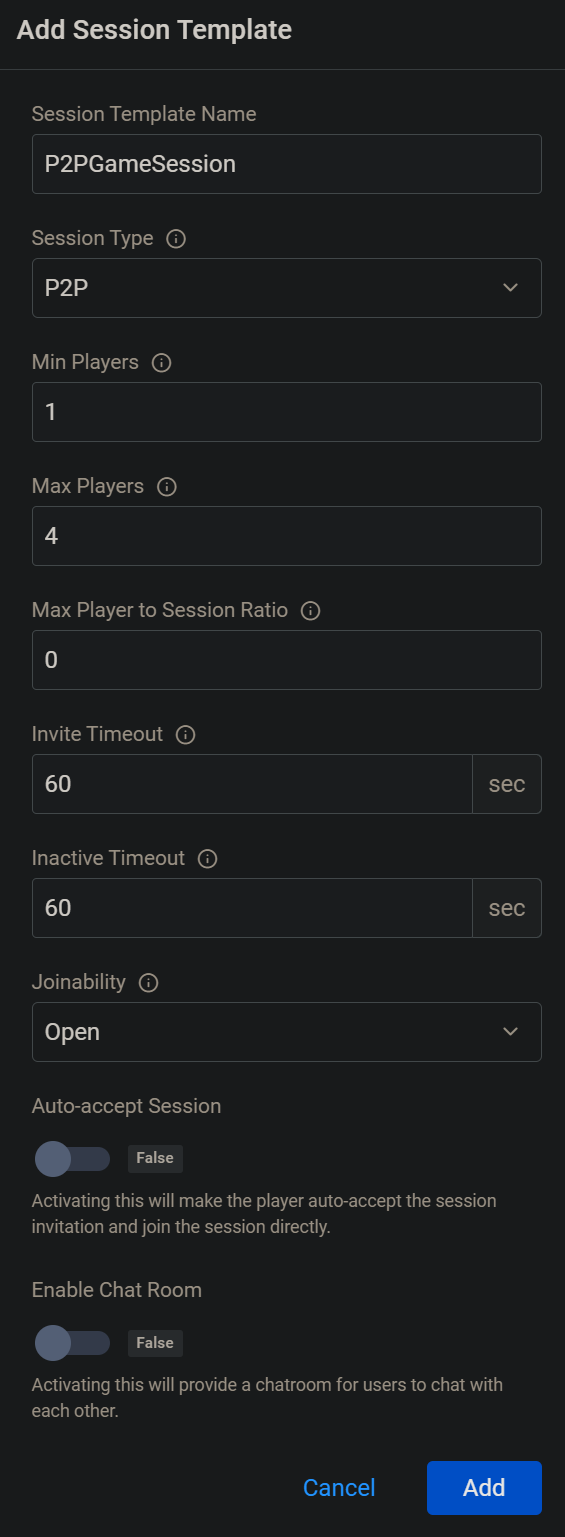
Create session template. Follow the steps in the Configure session templates article to configure session templates. Then, make sure to choose P2P for the session type as shown below.
Create match ruleset and match pool. Follow the steps in the Configure match ruleset article and in the Configure match pool article. Then, make sure to choose the correct session template with the P2P session type that you created in step 1.
Integrate Matchmaking V2 in game client. To learn more about the matchmaking flow, refer to the Integrate Matchmaking into your game client. The flow is similar to matchmaking with dedicated servers. The difference with P2P is that after the match is found and the game session is created, the invitation is sent to all game session members and the member that accepts first will be the host and the others will be clients.
Setup
Make sure you have set up IAM Clients with proper permissions to be used for the game. Follow the steps in the Manage access control for application article.
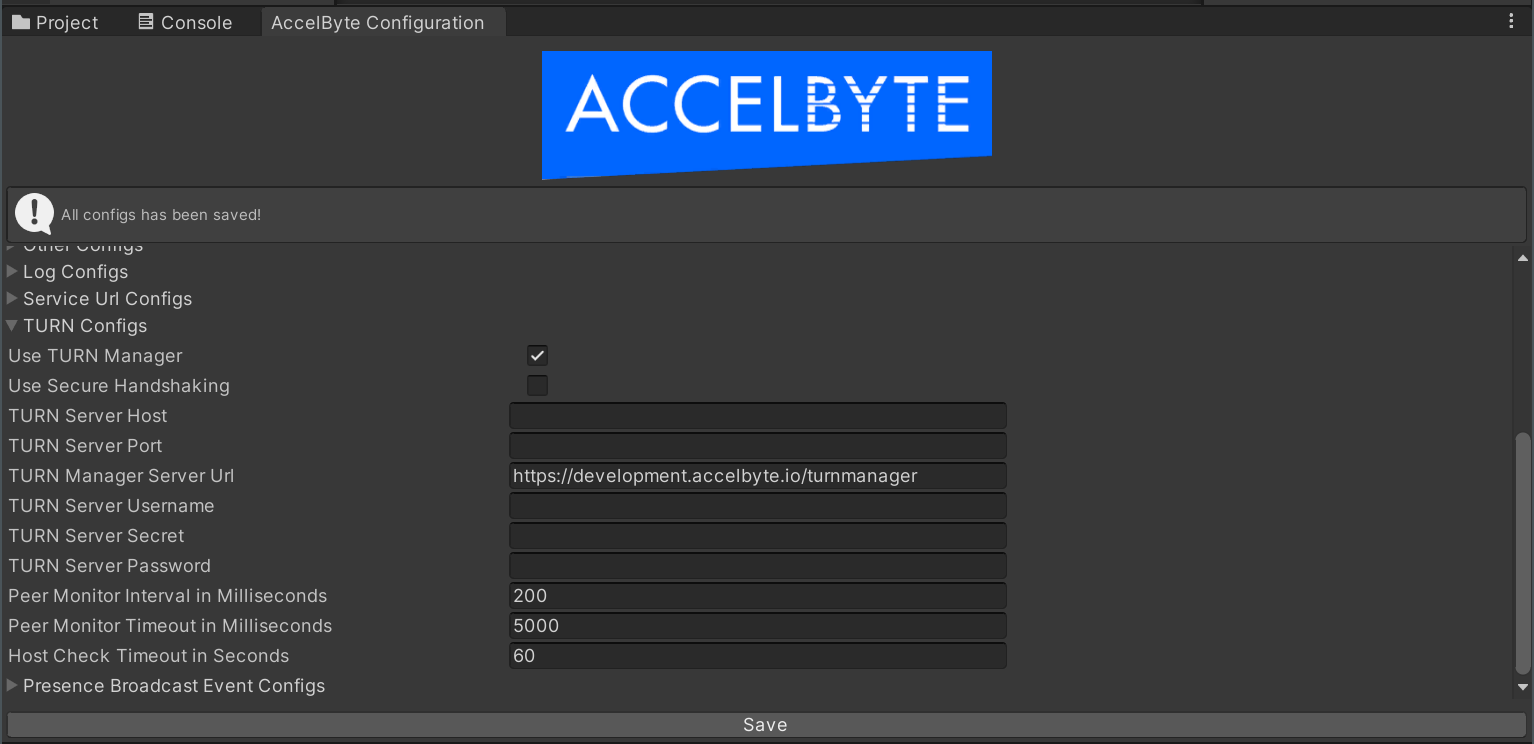
Enable P2P related settings. You can use exact configuration as shown in the image below. We recommend using this configuration. For turn manager server URL, change it to your environment-specific URL. Turn server host, port, username, secret and password are optional. These settings are only used when using static auth key for the turn server. In this example, we use dynamic auth key and tbe mentioned settings are left empty.
Initialize AccelByte network transport and listen to network event
Before initializing the network transport of the game client, you need to log in to AGS and connect to the lobby first. The following snippet code shows how to connect and initialize network transport.
var apiClient = MultiRegistry.GetApiClient();
var user = apiClient.GetUser();
var lobby = apiClient.GetLobby();
var session = apiClient.GetSession();
var matchmaking = apiClient.GetMatchmakingV2();

// instantiate transport manager
AccelByteNetworkTransportManager TransportManager = gameObject.AddComponent<AccelByteNetworkTransportManager>();

// Initialize transport manager after the client is logged in and lobby is connected
lobby.Connected += () =>
{
    TransportManager.Initialize(apiClient);
};

// Login and connect lobby
Result<TokenData, OAuthError> loginResult = null;
user.LoginWithUsernameV3("username", "password", result =>
{
    loginResult = result;

    if (!loginResult.IsError)
    {
        lobby.Connect();
    }
});
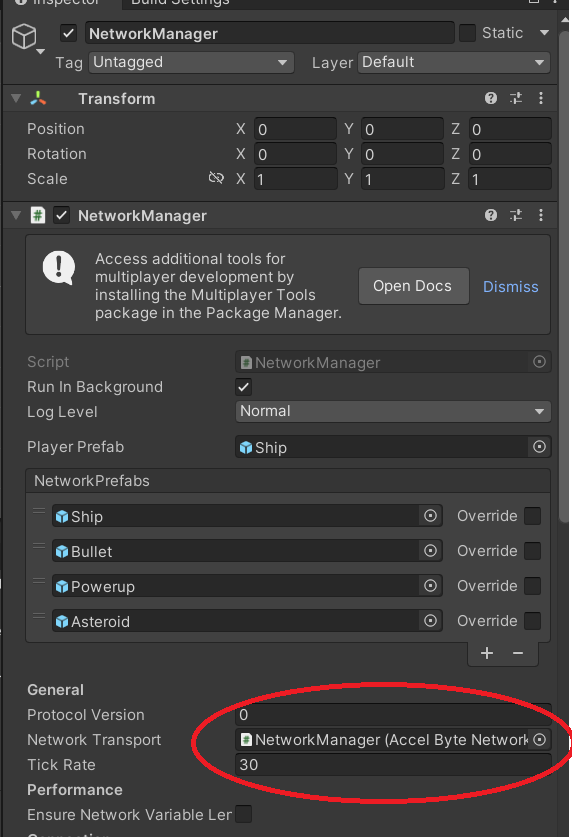
If you have Unity Netcode in your scene's singleton, you can pass the component's reference to the NetworkTransport selection.
Start matchmaking, join game session, and initiate P2P connection
Below is snippet code for start matchmaking
// Listen to matchmaking notification and game session invitation
lobby.MatchmakingV2MatchmakingStarted += result =>
{
    if (result.IsError)
    {
        // handle error
        return;
    }

    Debug.Log($"Matchmaking started: {result.Value.ticketId}");
};

lobby.MatchmakingV2MatchFound += result =>
{
    if (result.IsError)
    {
        // handle error
        return;
    }

    Debug.Log($"Match found: {result.Value.id} {result.Value.matchPool}");
};

// This notification will be received after match is found and game client can accept it
lobby.SessionV2InvitedUserToGameSession += result =>
{
    if (result.IsError)
    {
        // Handle error
        return;
    }

    Debug.Log($"Invited to a game session {result.Value.sessionId}");

    session.JoinGameSession(result.Value.sessionId, joinGameSessionResult =>
    {
        if (joinGameSessionResult.IsError)
        {
            // Handle error
            return;
        }

        Debug.Log($"Successfully joined game session {joinGameSessionResult.Value.id}");

        // Start as a host if the current user is the leader of game session (it means that this user is the first one to join the game)
        string gameSessionLeaderId = joinGameSessionResult.Value.leaderId;
        if (gameSessionLeaderId == "current-user-member-id")
        {
            transportManager.StartServer();
        }
        else
        {
            transportManager.SetTargetHostUserId(gameSessionLeaderId);
            transportManager.StartClient();
        }
    });

    // Start matchmaking
    var optionalParams = new MatchmakingV2CreateTicketRequestOptionalParams();
    matchmaking.CreateMatchmakingTicket("matchpool-name", optionalParams, createMatchTicketResult =>
    {
        if (createMatchTicketResult.IsError)
        {
            // handle error
            return;
        }

        Debug.Log($"Successfully created matchmaking ticket {result.Value.sessionId}");
    });
Send data to peer without Unity Netcode
To send data to peer, use this method in your game client:
byte[] data = System.Text.Encoding.ASCII.GetBytes("sample data");
ulong peerId = 0;
transportManager.Send(peerId, new ArraySegment<byte>(data), NetworkDelivery.Reliable);
Receive data from peer without Unity Netcode
To receive data from peer, you can set the game client to listen to the previously registered callback for OnTransportEvent, or, alternatively, poll the events using this method:
var networkEvent = transportManager.PollEvent(out ulong clientId, out ArraySegment<byte> payload, out float receiveTime);